Introduction to Birthstone Jewelry
There’s something magical about wearing jewelry that connects to your birth month. As someone who’s been crafting birthstone jewelry for over five years, I can tell you that these pieces carry both beauty and meaning. When I made my first garnet earrings (my January birthstone), I felt a special connection that store-bought jewelry just couldn’t match.
Birthstones have been cherished for centuries, with each gem believed to bring luck and protection to those born in its corresponding month. What I love most about creating DIY birthstone jewelry is how personal it becomes—whether you’re making a gift for a loved one or treating yourself to something special that represents your own birth month.
Don’t worry if you’re new to jewelry making! I started with zero experience and plenty of fumbled attempts. These 12 projects are specifically designed for beginners, with simple techniques that don’t require expensive equipment or years of practice.
Tools and Materials You Will Need
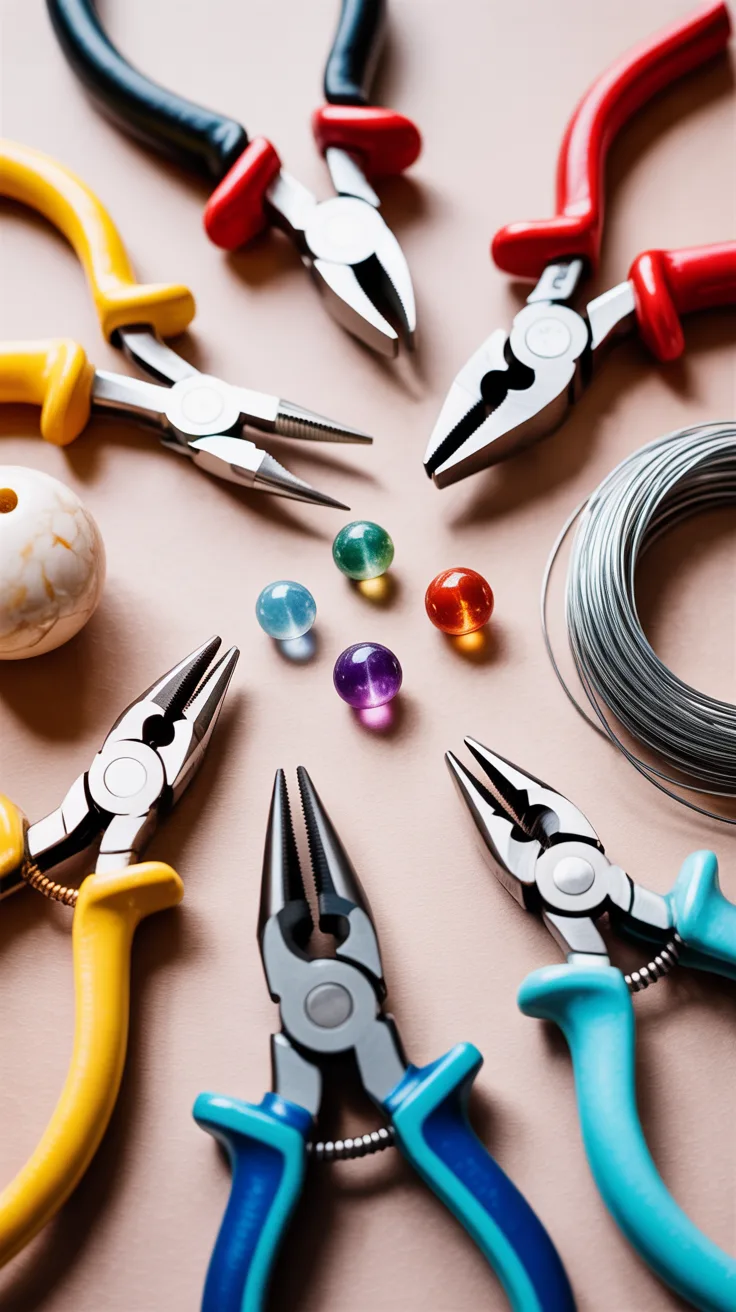
Before we dive into creating beautiful birthstone jewelry, let’s gather our supplies. I remember my first jewelry-making attempt—I was so excited that I forgot half the tools and ended up improvising with household items (not recommended!).
- Basic tools: Round-nose pliers, chain-nose pliers, wire cutters
- Materials: Jewelry wire (20-24 gauge), beading wire, crimp beads
- Findings: Earring hooks, clasps, jump rings, head pins, eye pins
- Birthstones: Natural or synthetic gemstone beads in your chosen birthstone
- Extras: Ruler, jewelry adhesive, bead mat, magnifying glass
Pro Tip: You don’t need to break the bank when starting out. I began with a $25 starter kit from a craft store that included basic pliers and wire cutters. As your skills grow, you can invest in better quality tools.
January: Garnet Earrings
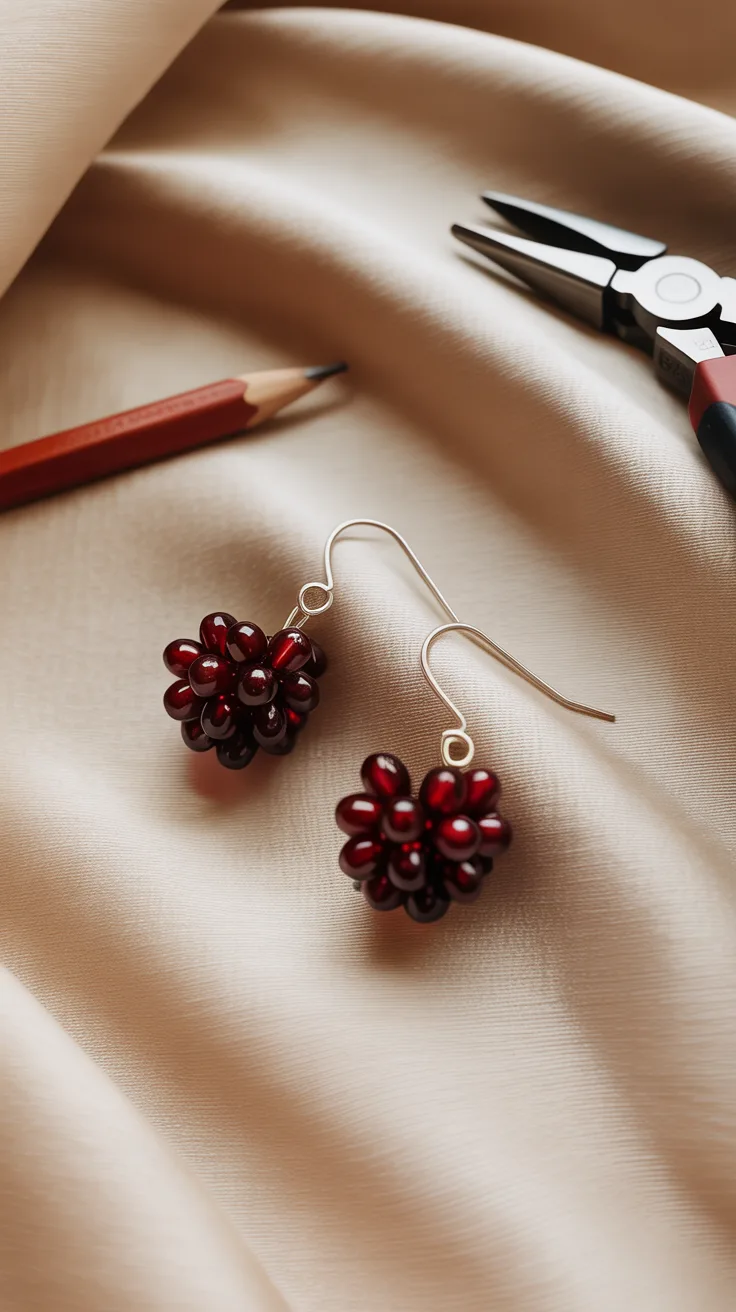
Garnets have this gorgeous deep red color that reminds me of pomegranate seeds. My first pair came out lopsided, but they still became one of my most-worn pieces!
- Select two matching garnet beads (6-8mm works well for beginners)
- Thread each bead onto a head pin
- Create a simple loop above each bead using round-nose pliers
- Attach the loops to earring hooks using jump rings

View on AmazonAs an Amazon Associate, I earn from qualifying purchases.

View on AmazonAs an Amazon Associate, I earn from qualifying purchases.
Pro Tip: If you’re struggling with making even loops, try wrapping the wire around a pencil first to get a consistent shape.
February: Amethyst Necklace
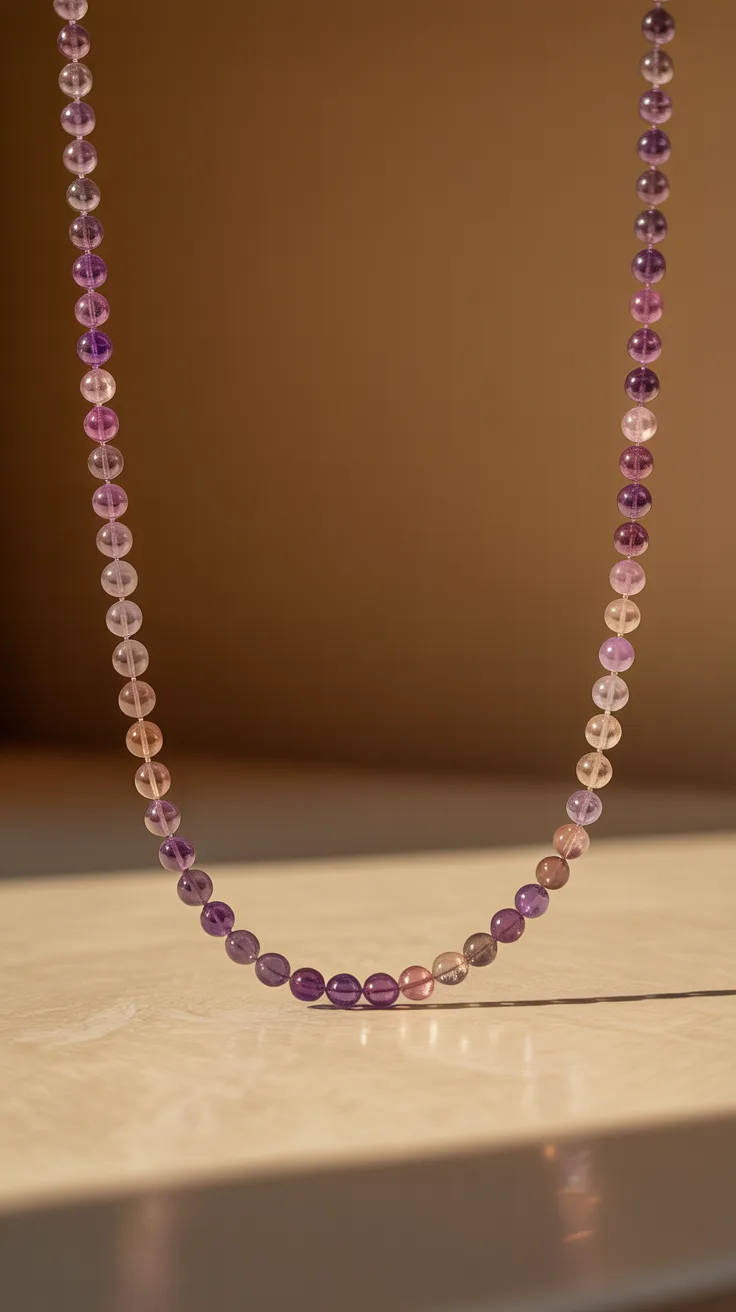
Amethysts range from pale lavender to deep purple. I once made this necklace for my sister’s birthday, and the look on her face when she opened it was priceless!
- Cut a 20-inch piece of beading wire (add extra for working room)
- String a crimp bead, then thread through one end of your clasp
- Loop back through the crimp bead and squeeze it closed with pliers
- Add amethyst beads, mixing in spacer beads for visual interest
- Finish the other end with another crimp bead and clasp part

View on AmazonAs an Amazon Associate, I earn from qualifying purchases.

View on AmazonAs an Amazon Associate, I earn from qualifying purchases.
Pro Tip: Create a graduated effect by placing larger beads in the center and smaller ones toward the ends—it’s more flattering when worn.
March: Aquamarine Bracelet
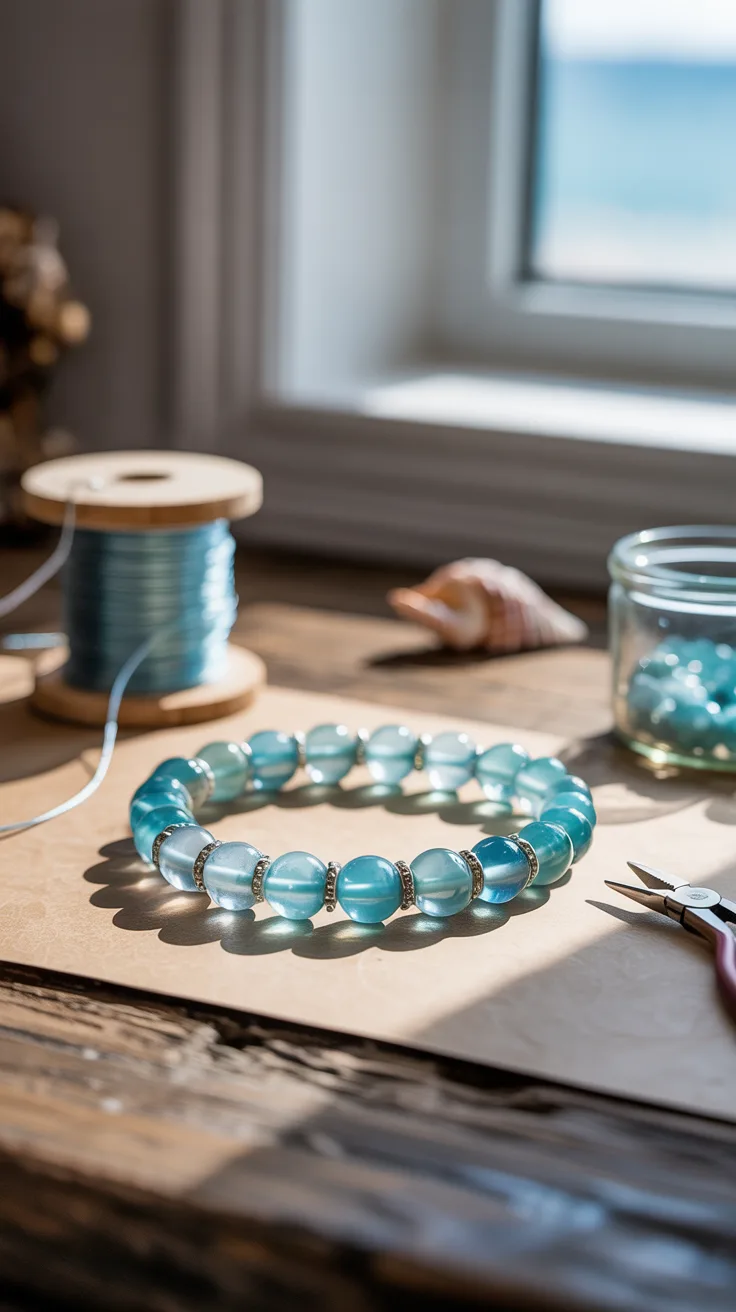
Aquamarine’s soothing blue reminds me of clear ocean waters. This was actually the third project I ever attempted, and it taught me the importance of measuring twice!
- Measure your wrist and add 1 inch for comfort and clasps
- Cut beading wire to this length plus 2 extra inches for working
- Secure one end with a crimp bead and clasp
- String aquamarine beads, adding silver spacers between each
- Finish with another crimp bead and the other half of your clasp

View on AmazonAs an Amazon Associate, I earn from qualifying purchases.

View on AmazonAs an Amazon Associate, I earn from qualifying purchases.
Pro Tip: Test the bracelet length by forming a circle before crimping the final end—I once made a bracelet so small it only fit my pinky finger!
April: Diamond Studs
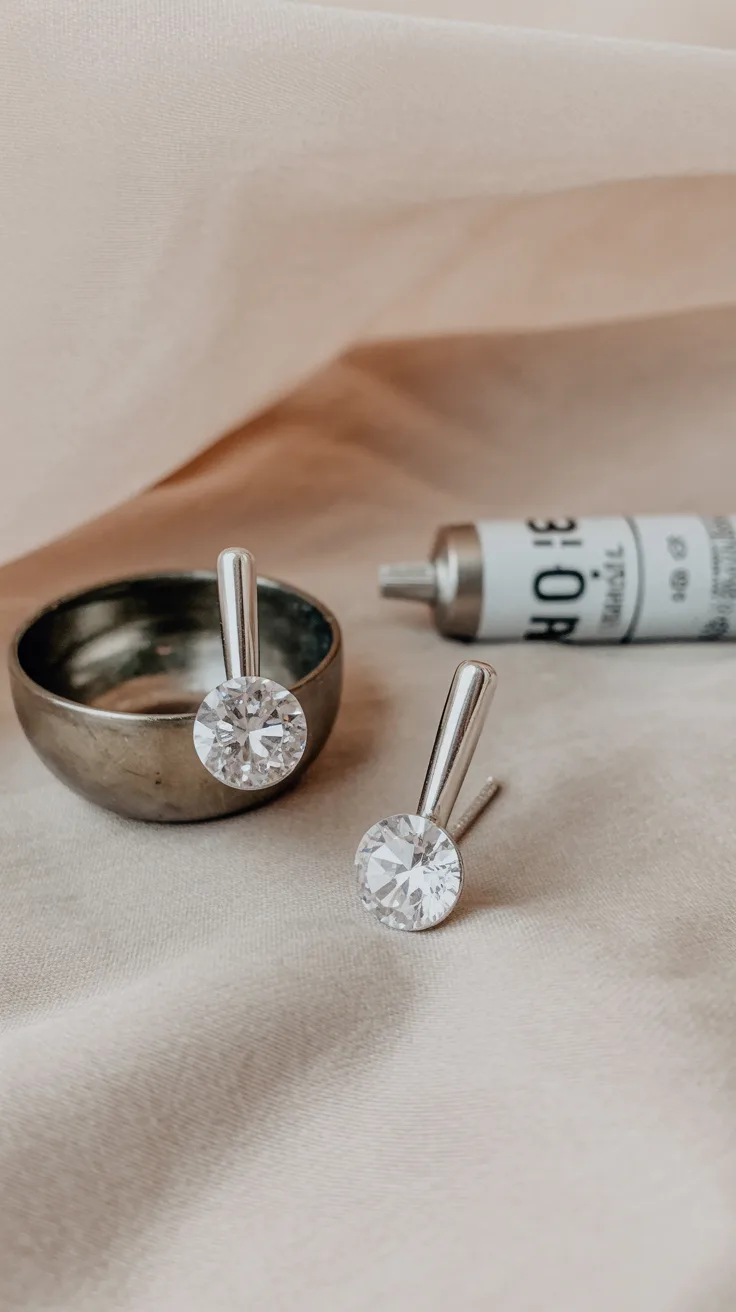
Don’t worry—we’re using diamond alternatives here! Cubic zirconia or crystal quartz make beautiful and affordable substitutes that still honor April’s birthstone.
- Select two matching crystal or cubic zirconia stones
- Apply a small amount of jewelry adhesive to stud settings
- Carefully place stones in settings and allow to dry completely (usually 24 hours)
- Attach butterfly backs if they’re not already included

View on AmazonAs an Amazon Associate, I earn from qualifying purchases.

View on AmazonAs an Amazon Associate, I earn from qualifying purchases.
Pro Tip: Work over a small bowl when setting stones—I once lost a tiny crystal on my carpet and never found it again!
May: Emerald Ring
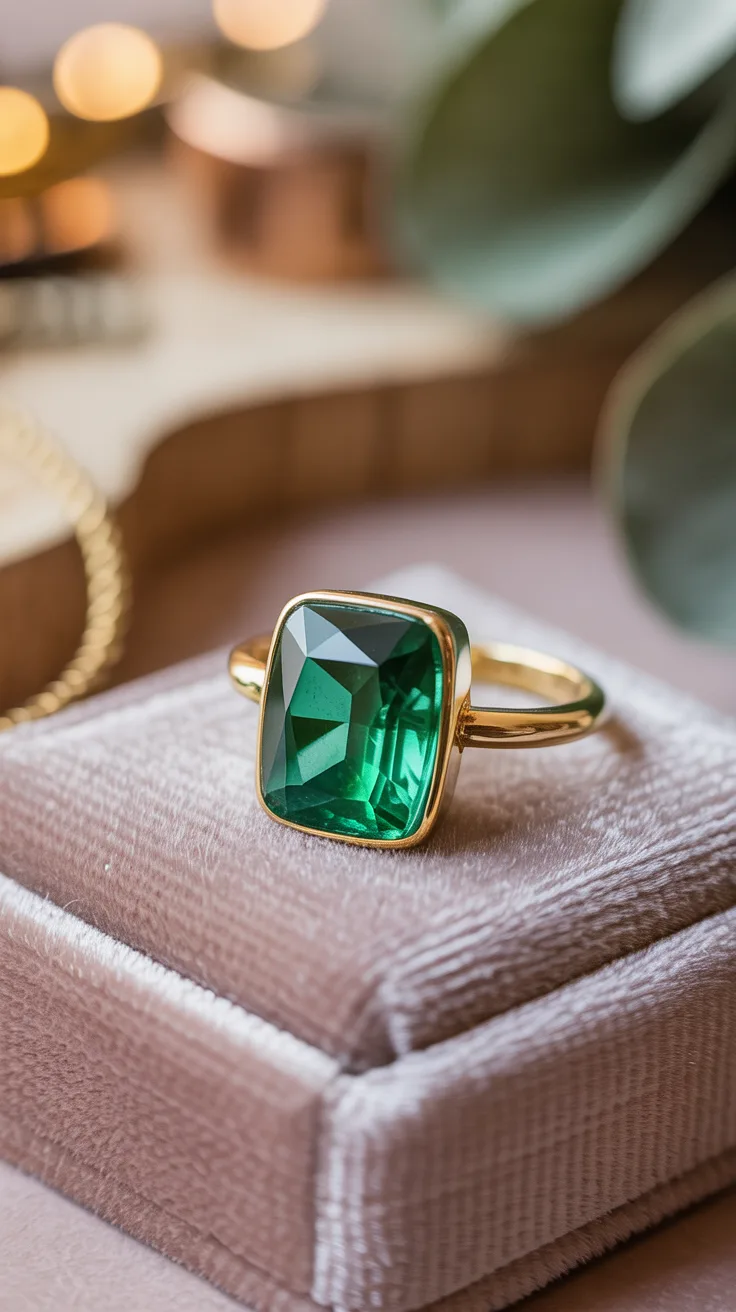
Emerald’s rich green color symbolizes rebirth and love. My first emerald ring project taught me patience—rushing the setting process never ends well.
- Choose an adjustable ring base with a flat pad
- Apply jewelry adhesive to the pad
- Place your emerald (or green glass/crystal alternative) onto the adhesive
- Allow to dry undisturbed for at least 24 hours

View on AmazonAs an Amazon Associate, I earn from qualifying purchases.

View on AmazonAs an Amazon Associate, I earn from qualifying purchases.
Pro Tip: If you’re using a natural emerald, be gentle—they can be more brittle than other gemstones. I learned this the hard way when I cracked one trying to force it into a setting.
June: Pearl Choker
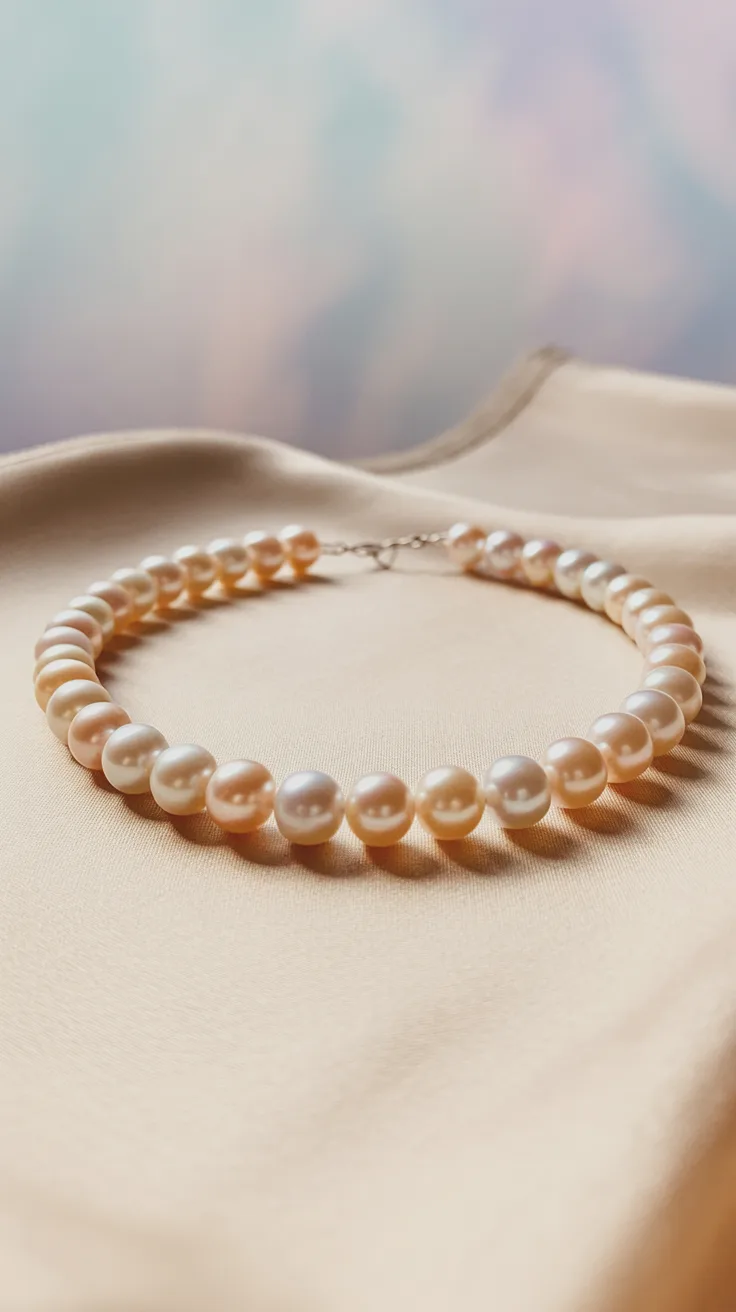
Pearls have this timeless elegance that never goes out of style. This project looks complicated but is surprisingly simple!
- Measure your neck and add 2 inches for the perfect choker length
- Thread a crimp bead onto beading wire, loop through half of your clasp, and crimp closed
- String freshwater pearls (or pearl-look beads) along the wire
- Finish with another crimp bead and the remaining clasp piece
Pro Tip: Pearls have delicate surfaces—always use a soft beading mat when working with them to prevent scratches.
July: Ruby Pendant
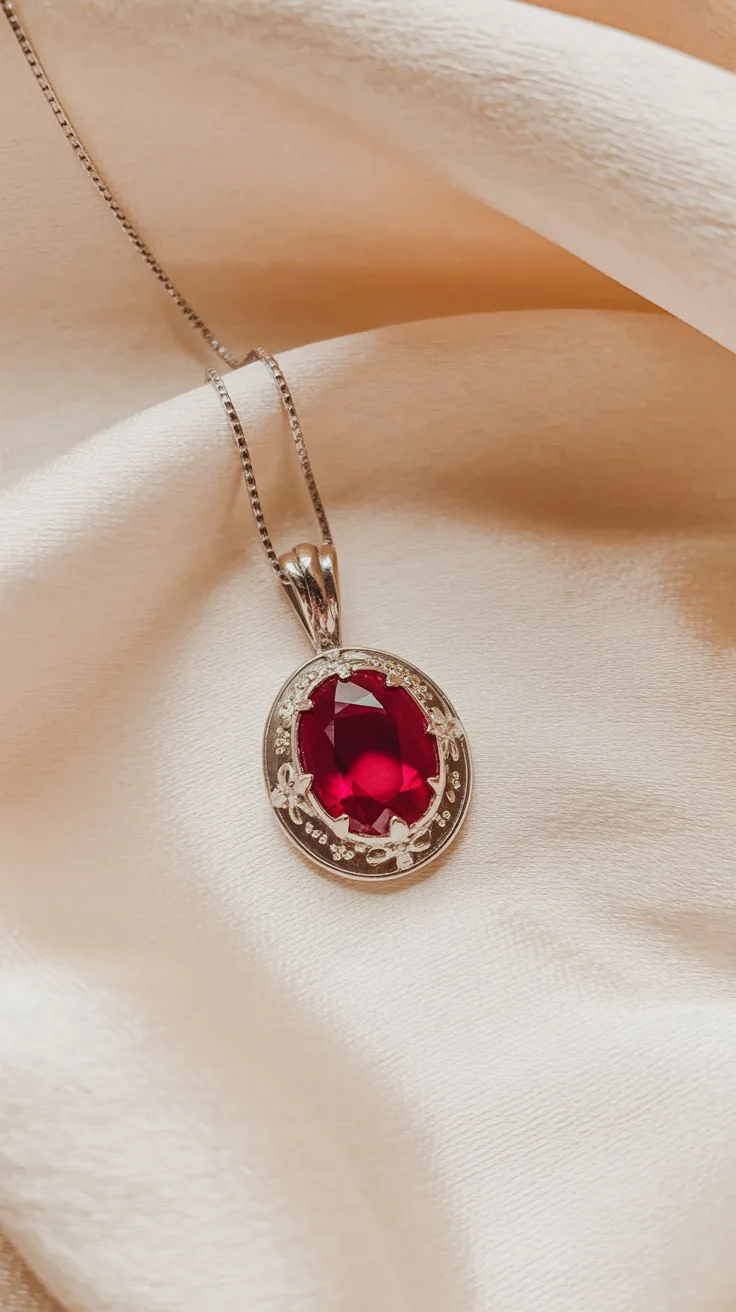
Ruby’s fiery red makes for a stunning pendant. I still remember wearing my first ruby pendant creation to a friend’s wedding—it received so many compliments!
- Select a ruby (or red crystal) and a pendant setting that fits it
- Apply jewelry adhesive to the setting
- Carefully position the stone and allow to dry completely
- Thread a chain through the pendant’s bail
- Attach a clasp to the chain if it doesn’t already have one
Pro Tip: For a more secure setting, add a tiny drop of clear nail polish over the dried adhesive—this trick has saved many of my pendants from losing their stones.
August: Peridot Anklet
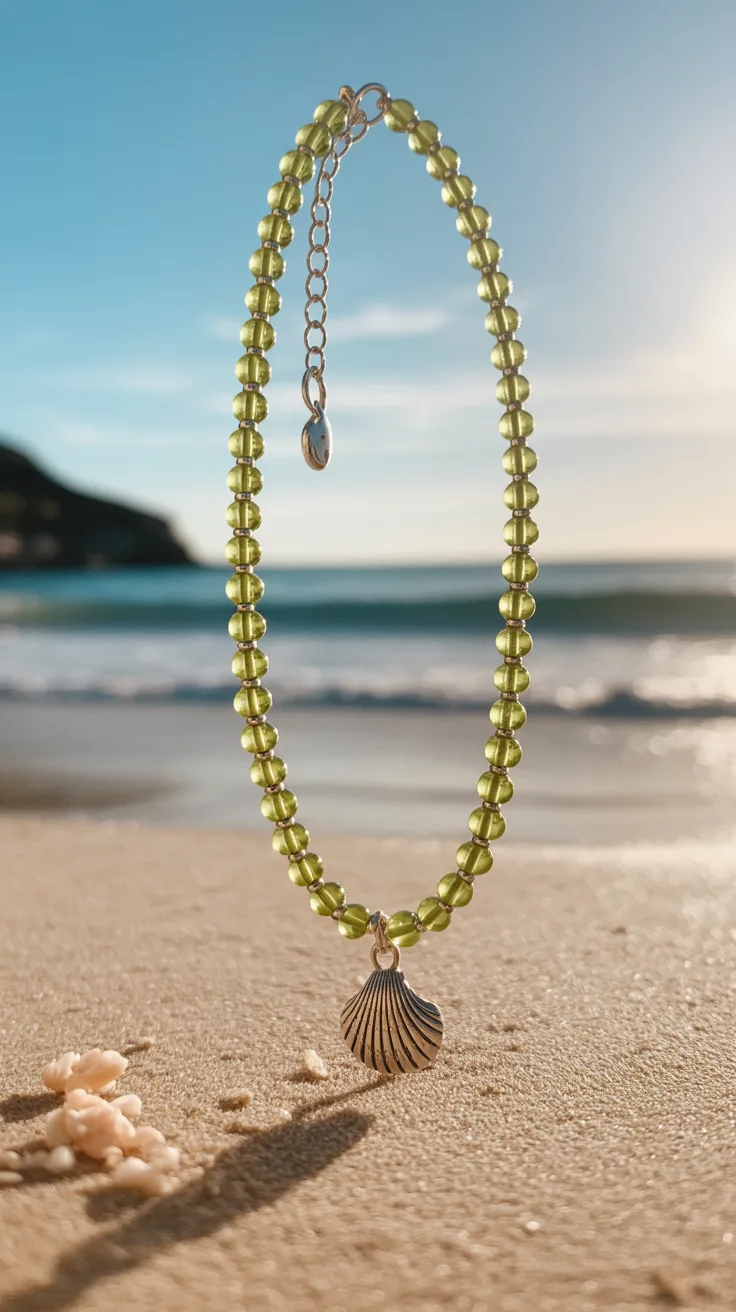
Peridot’s lime-green color is perfect for summer anklets. I made one for a beach vacation and loved how it caught the sunlight.
- Measure around your ankle and add 1 inch for comfort
- Cut beading wire to this length plus 2 inches for working
- Secure one end with a crimp bead and clasp
- String alternating peridot beads and tiny silver beads
- Finish with another crimp bead and clasp end
Pro Tip: Add a small charm to your anklet for a personalized touch—I like to add tiny seashell charms to mine.
September: Sapphire Brooch
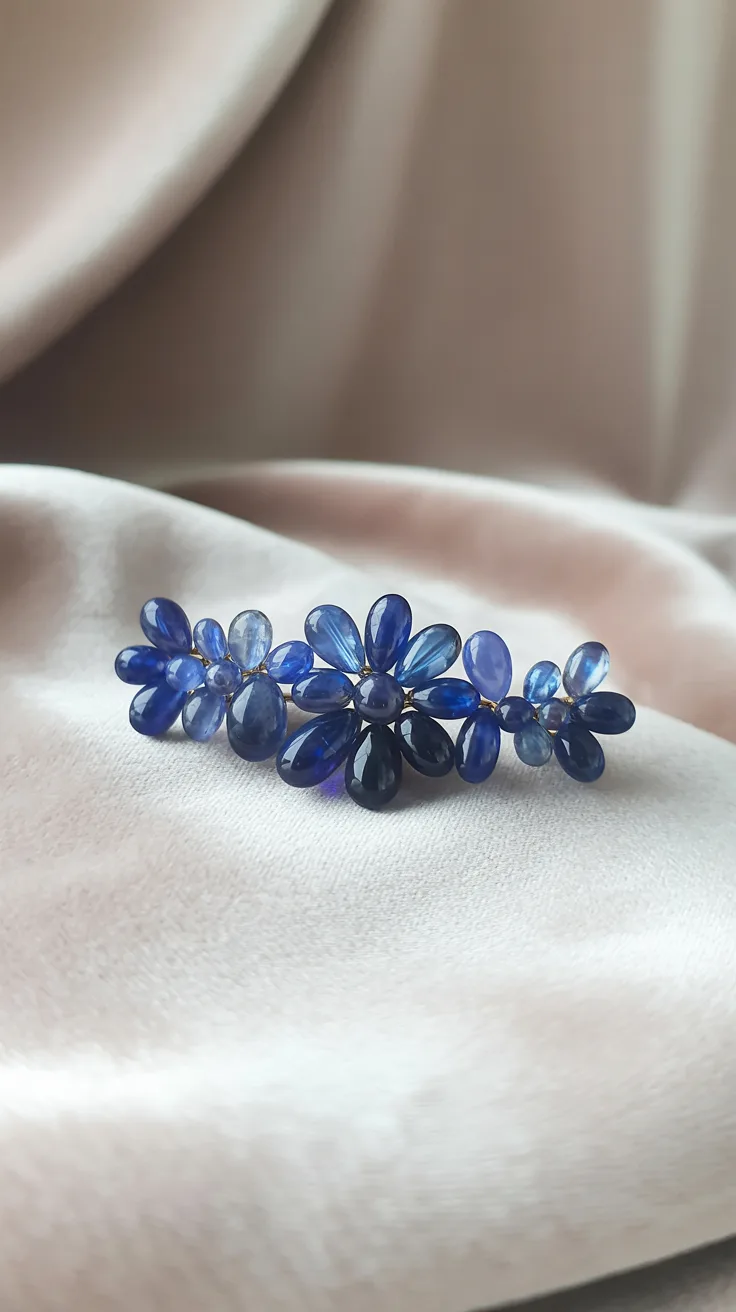
Sapphires come in many colors, though blue is most traditional. This brooch project intimidated me at first, but it’s actually quite straightforward.
- Select a plain brooch base with a flat surface
- Arrange sapphire beads in your desired pattern
- One by one, secure beads with jewelry adhesive
- Allow to dry completely before wearing
Pro Tip: Draw your design on paper first, then place the brooch base over it as a guide while you work.
October: Opal Hairpin
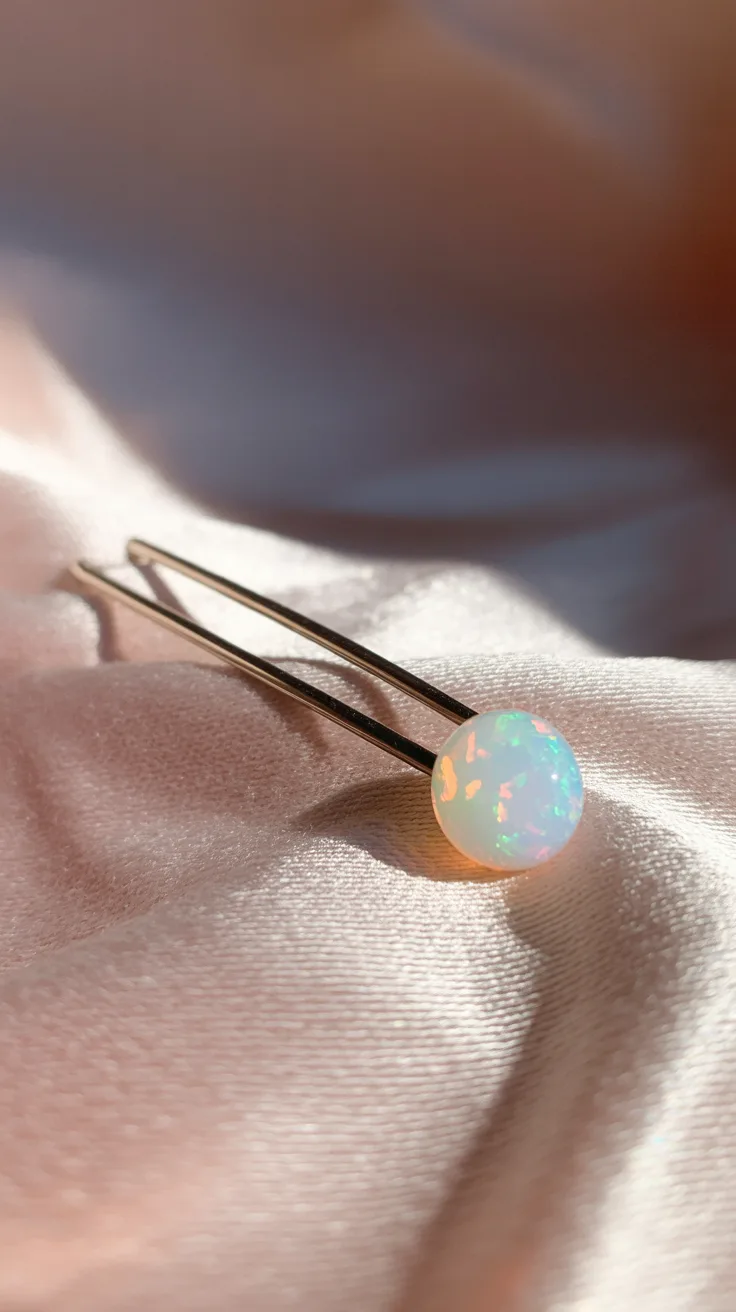
Opals have this magical way of catching light and showing multiple colors. This hairpin project is quick but makes a big impact.
- Choose a plain metal hairpin and an opal cabochon (flat-backed stone)
- Apply a small amount of jewelry adhesive to the flat end of the hairpin
- Press the opal onto the adhesive
- Allow to dry completely before using
Pro Tip: If you can’t find opal, look for “opalite” which is more affordable but still has that beautiful color-shifting quality.
November: Topaz Cufflinks

Topaz comes in many colors, with golden-yellow being traditional for November. These make great gifts for the men in your life!
- Purchase plain cufflink bases with flat tops
- Apply jewelry adhesive to each base
- Place a topaz cabochon on each base
- Allow to dry undisturbed for 24 hours
Pro Tip: If making these as a gift, present them in a small box lined with cotton—it elevates the whole experience.
December: Turquoise Necklace
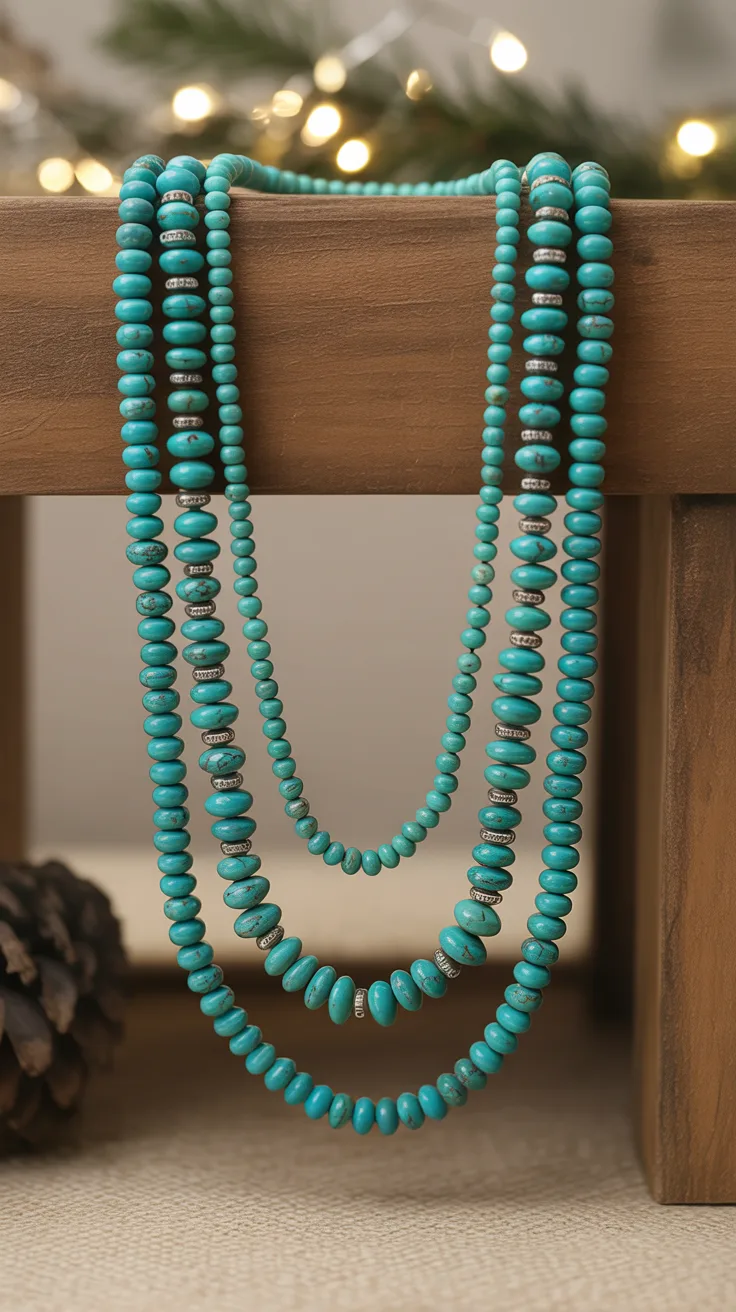
Turquoise’s distinctive blue-green color makes for eye-catching jewelry. This layered necklace is my go-to for holiday parties.
- Cut three lengths of beading wire (16″, 18″, and 20″)
- Create three separate strands of turquoise beads, each with its own clasp
- Wear all three strands together for a layered look
Pro Tip: Mix in some silver beads with the turquoise for a southwestern-inspired look that really pops.
Conclusion
Creating your own birthstone jewelry is incredibly rewarding. I’ve gone from fumbling with my first pair of pliers to confidently crafting pieces I’m proud to wear and gift. Each project teaches you something new, and there’s nothing quite like the satisfaction of saying, “I made this!”
Remember that perfection isn’t the goal, especially when you’re starting out. Some of my most cherished pieces have little imperfections that make them uniquely mine. Start with your own birthstone or create